
Clear stamps have revolutionized the art of stamping, offering crafters a clear advantage over traditional rubber stamps. When cleaning clear stamps, it’s important to adopt the right techniques to ensure longevity. Unlike rubber stamps, clear stamps are more delicate and can be prone to damage if not handled with care.
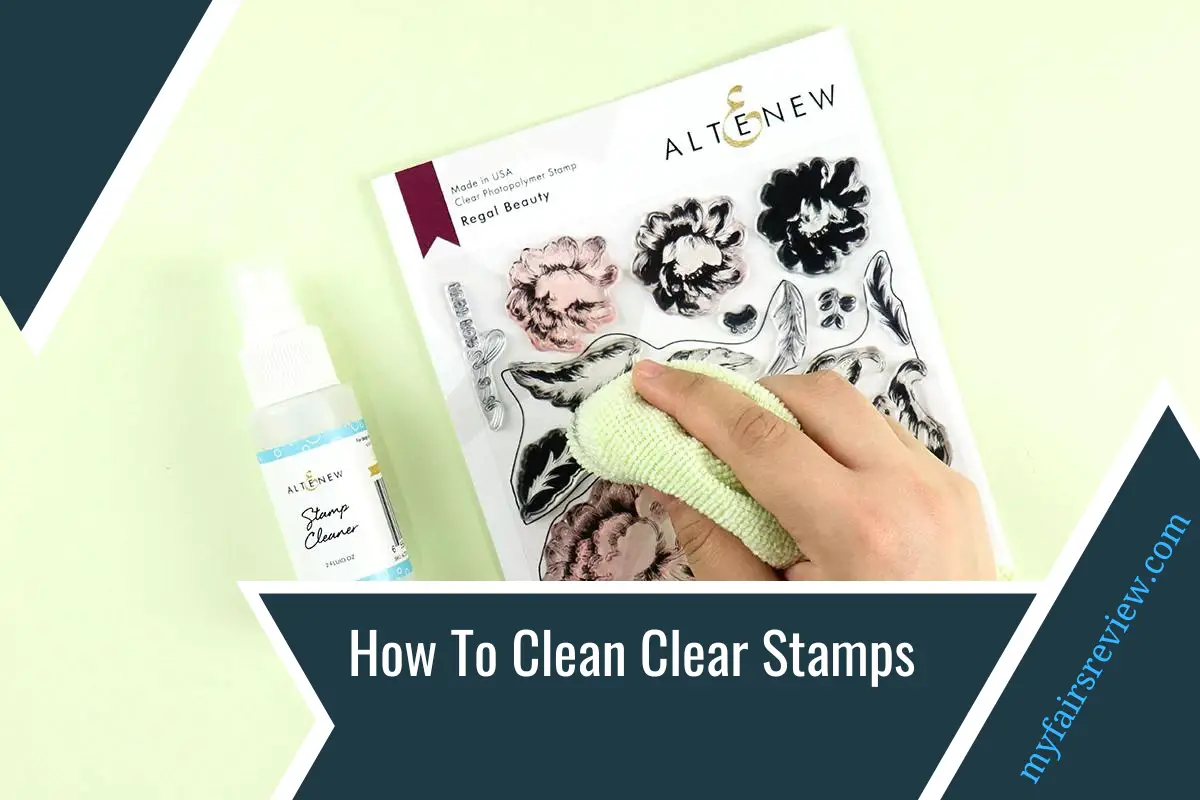
Cleaning stamp is a straightforward process that can be accomplished with simple tools and household items. To clean clear stamps, gently wipe them with a damp cloth or stamp cleaner to remove ink residue. Avoid using harsh chemicals or scrubbing vigorously to prevent damage. Dry the stamps thoroughly.
Follow this expert advice and discover the joy of working with clean, well-maintained stamps that bring your creative visions to life. Let’s dive in and unlock the secrets to pristine, picture-perfect stamping!
7 Steps To Clean Clear Stamps Like An Experienced Guide:
Discover the essential steps to clean your clear stamps and maintain their longevity effectively. Following these simple guidelines, you can ensure that your clear stamps remain pristine, providing crisp and clear impressions for your future crafting projects.
Step 1: Gather The Necessary Tools
When cleaning clear stamps, having the right tools is essential. With the proper tools, you can efficiently remove ink residue and maintain the quality of your stamps. In this section, we’ll explore the necessary tools to keep clear stamps clean and ready for your creative endeavors.
- Paper towel or lint-free cloth
- Scrap paper
- Stamp cleaning pad or stamp scrubber
- Stamp cleaner or mild soap
- Lukewarm water
- Clean cloth or paper towel
- Clean, dry surface
- Optional: Stamp storage case, zip-top bag, or clear stamp storage folder
Step 2: Prepare A Clean Surface
Find a flat and clean surface to work on, such as a craft mat, paper towel, or a lint-free cloth. This will provide a stable and clean area to clean your clear stamps.
Step 3: Remove Excess Ink
Before starting the cleaning process, it’s important to remove any excess ink from the clear stamp. You can do this by lightly tapping the stamp on scrap paper or a stamp scrubber. Continue tapping until most ink is transferred onto the paper, leaving the stamp with minimal residue.
Step 4: Clean With Stamp Cleaner Or Mild Soap
Apply a small amount of stamp cleaner specifically designed for clear stamps onto a stamp cleaning pad, stamp scrubber, or soft cloth. Alternatively, you can use mild soap (such as dish soap) diluted with water. Gently rub the stamp’s surface in a circular motion using the cleaning pad, sponge, or cloth. This will help remove any remaining ink residue.
Step 5: Rinse With Water
If you used soap to clean the stamps, rinse them under lukewarm water to remove any soapy residue. Hold the stamp with the design side facing down, and let the water flow over the stamp, ensuring that the water reaches all areas of the stamp. Be cautious not to wet the foam cushion or acrylic block if the stamp is mounted on one.
Step 6: Pat Dry And Air
Dry After rinsing, gently pat the stamp dry with a clean cloth or paper towel to remove excess moisture. It’s important to thoroughly dry the stamp before storing it to prevent any moisture-related damage.
Place the stamp on a clean surface, such as a dry paper towel, and let it air dry completely. This usually takes a few minutes, depending on the ambient humidity.
Step 7: Store Properly
Once the clear stamp is completely dry, it’s essential to store it properly to maintain its quality. Store the stamp in a cool, dry place away from direct sunlight and extreme temperature fluctuations. You can use a stamp storage case, a zip-top bag, or a clear stamp storage folder to keep your stamps organized and protected from dust and moisture.
Avoid These 6 Common Mistakes When Cleaning Clear Stamps:
Cleaning clear stamps is a straightforward process, but there are a few common mistakes to avoid ensuring the longevity and performance of your stamps. By being aware of these pitfalls, you can maintain the quality of your clear stamps and enjoy their creative potential for years.
- Using Harsh Chemicals:
Avoid using harsh chemicals like bleach or solvents to clean your clear stamps. These can cause discoloration, warping, or even dissolve the stamp material. Stick to gentle cleaning solutions designed for clear stamps or mild soap diluted with water.
- Scrubbing Vigorously:
Clear stamps are delicate and can easily be damaged if you aggressively scrub them. Instead, use gentle circular motions when cleaning with a pad, sponge, or cloth. This will help remove ink residue without putting excessive pressure on the stamp surface.
- Using Abrasive Materials;
Stay away from abrasive materials like rough sponges or scrub brushes, as they can scratch or damage the surface of the clear stamps. Opt for soft and non-abrasive cleaning tools, such as stamp cleaning pads or soft cloths, to ensure gentle and safe cleaning.
- Allowing Stamps To Soak;
Avoid soaking your clear stamps in water or cleaning solutions for an extended period. Excessive soaking can cause the adhesive layer that attaches the stamp to the acrylic block to weaken or break down. Instead, rinse the stamps briefly under lukewarm water to remove any cleaning solution.
- Neglecting To Dry Stamps Thoroughly:
After cleaning and rinsing your clear stamps, dry them thoroughly. Leaving moisture on the stamps can lead to mold growth or the stamps sticking together, potentially ruining their quality. Use a clean cloth or paper towel to pat the stamps dry, and then let them air dry completely before storing them.
- Storing Damp Stamps:
Never store clear stamps while they are still damp. Moisture can promote mold growth or cause the stamps to stick together, making them difficult to separate. Ensure the stamps are completely dry before storing them in a cool, dry place away from direct sunlight.
7 Tips To Follow To Keep Clear Stamps Long Lasting Forever:
Implementing a few maintenance tips can go a long way to ensure the longevity and optimal performance of your clear stamps. In this section, I’ll share valuable tips to help you maintain your clear stamps and maximize their lifespan.
Tip 1: Clean Stamps After Each Use
To prevent ink residue from building up, make it a habit to clean your clear stamps after each use. This will help maintain their clarity and ensure consistent stamping results.
Tip 2: Use A Stamp Cleaner Designed For Clear Stamps
Invest in a stamp cleaner formulated explicitly for clear stamps. These cleaners are gentle and effective in removing ink without damaging the stamps. Avoid using harsh chemicals or alcohol-based cleaners that can deteriorate the stamp material.
Tip 3: Handle Stamps With Clean Hands
Before using clear stamps, ensure your hands are clean and free from oils, lotions, or ink. Oily or dirty hands can transfer contaminants onto the stamps, affecting their performance and smudged impressions.
Tip 4: Store Stamps Properly
Proper storage is crucial for maintaining clear stamps. Store them in a cool, dry place away from direct sunlight to prevent discoloration or warping. Consider using a stamp storage case or a clear stamp storage folder to keep them organized and protected from dust and moisture.
Tip 5: Beware Of High Temperatures
Changing temperatures can cause clear stamps to lose their clarity. Avoid exposing them to extreme heat or cold, which can cause the stamps to warp or become brittle. Store them in a temperature-controlled environment to maintain their integrity.
Tip 6: Use An Acrylic Block Of The Appropriate Size
When using clear stamps, ensure you use an acrylic block that matches the stamp size. Using a block that is too small can result in uneven pressure and incomplete impressions. Using a too large block can make it challenging to accurately align the stamp.
Tip 7: Avoid Excessive Pressure
Apply even and gentle pressure when stamping. Excessive pressure can cause the stamp to distort or the image to smudge. Clear stamps are designed to provide crisp impressions with minimal pressure.
Related Questions:
How Often Should You Clean Your Clear Stamps?
To maintain the best stamping results, it is recommended to clean your clear stamps after each use. Cleaning them regularly prevents ink residue from building up on the surface, affecting the stamped images’ clarity and quality.
By making it a habit to clean your clear stamps after each stamping session, you ensure that they are ready for the next use. This practice also helps prevent cross-contamination of ink colors and ensures consistent and crisp impressions every time you stamp.
Can You Use Any Cleaning Solution For Your Clear Stamps?
It is advisable to use cleaning solutions specifically formulated for clear stamps. These cleaners are designed to effectively remove ink residue without causing damage to the stamps. They are usually gentle and safe to use on the clear stamp material.
Harsh chemicals, alcohol-based solutions, and abrasive cleaners should be avoided as they can degrade the stamp material, cause discoloration, or leave scratches on the stamps. Using the right cleaning solution helps maintain the stamps’ transparency and integrity, prolonging their lifespan and ensuring optimal stamping performance.
How Should You Store Your Clear Stamps?
Proper storage is crucial for preserving the quality and lifespan of clear stamps. It is recommended to store them in a cool, dry place away from direct sunlight. Exposure to sunlight or extreme temperatures can lead to warping, fading, or brittleness of the stamps.
Consider using a stamp storage case, a clear stamp storage folder, or a zip-top bag to keep your stamps organized and protected from dust and moisture. These storage options help prevent the stamps from sticking together and minimize the risk of damage.
Conclusion:
Maintaining and cleaning clear stamps is essential for longevity and optimal performance. By following the recommended steps and avoiding common mistakes, you can ensure that your stamps remain in excellent condition, delivering crisp and clear impressions for your crafting projects. Use appropriate cleaning solutions to clean the clear stamps and handle them carefully.
Proper storage in a cool and dry environment will protect them from dust and moisture. By implementing these tips, you can enjoy the full potential of your clear stamps and continue creating beautiful designs for years to come.