
Antique hand tools can be stored using various storage solutions, including toolboxes, wall-mounted racks, and custom-made cabinets specifically designed for organizing and protecting these valuable items. Providing adequate storage not only helps preserve the condition of the tools but also makes them easily accessible for use or display.
Toolboxes with adjustable compartments and foam inserts offer a practical and portable solution, while wall-mounted racks maximize space efficiency. Custom-made cabinets can be tailored to accommodate individual tool sizes and provide additional security and aesthetic appeal. Proper storage solutions for antique hand tools are essential to maintain their functionality and value, ensuring they can be enjoyed for generations to come.
Organizing Antique Hand Tools
Discover practical storage solutions for antique hand tools that help preserve their value and keep them organized. From custom tool chests to wall-mounted racks, there are numerous options available to ensure your tools are easily accessible and well-maintained.
Importance Of Organizing Hand Tools
Keeping your antique hand tools organized is crucial for several reasons. Not only does it make it easier to locate the right tool when you need it, but it also helps protect your valuable tools from damage. Here are some key points to consider:
- Efficient workflow: By organizing your hand tools, you can create a more efficient workflow. You won’t waste time searching for a specific tool, as everything will have its designated place.
- Prevent damage: Proper organization reduces the risk of tools getting damaged. With a specific storage system in place, you can avoid accidental dropping or mishandling of your antique hand tools.
- Easy maintenance: When your tools are well organized, it becomes much easier to clean and maintain them regularly. You can quickly identify any signs of wear and tear and address them promptly, ensuring the longevity of your tools.
- Enhance safety: Organizing your tools helps promote a safe working environment. When tools are stored properly, there is less chance of injury from tripping over clutter or accidentally coming into contact with sharp edges.
Categorizing Tools Based On Type
Categorizing your antique hand tools based on their type is an effective way to streamline organization. Here are some tips on how to categorize your tools:
- Grouping by function: Start by categorizing the tools based on their primary function. For example, separate saws, planes, chisels, and measuring tools into distinct groups.
- Identifying subcategories: Within each group, consider further subcategorization based on specific tool characteristics. For instance, you could separate different types of saws based on their tooth configuration or blade length.
- Labeling and tagging: Use clear labels or tags for each category and subcategory to ensure easy identification. This can be done by attaching labels to shelves or using adhesive tags directly on the tools themselves.
Utilizing Shelves And Racks For Storage
Shelves and racks offer excellent storage solutions for organizing your antique hand tools. Here are some ideas to consider:
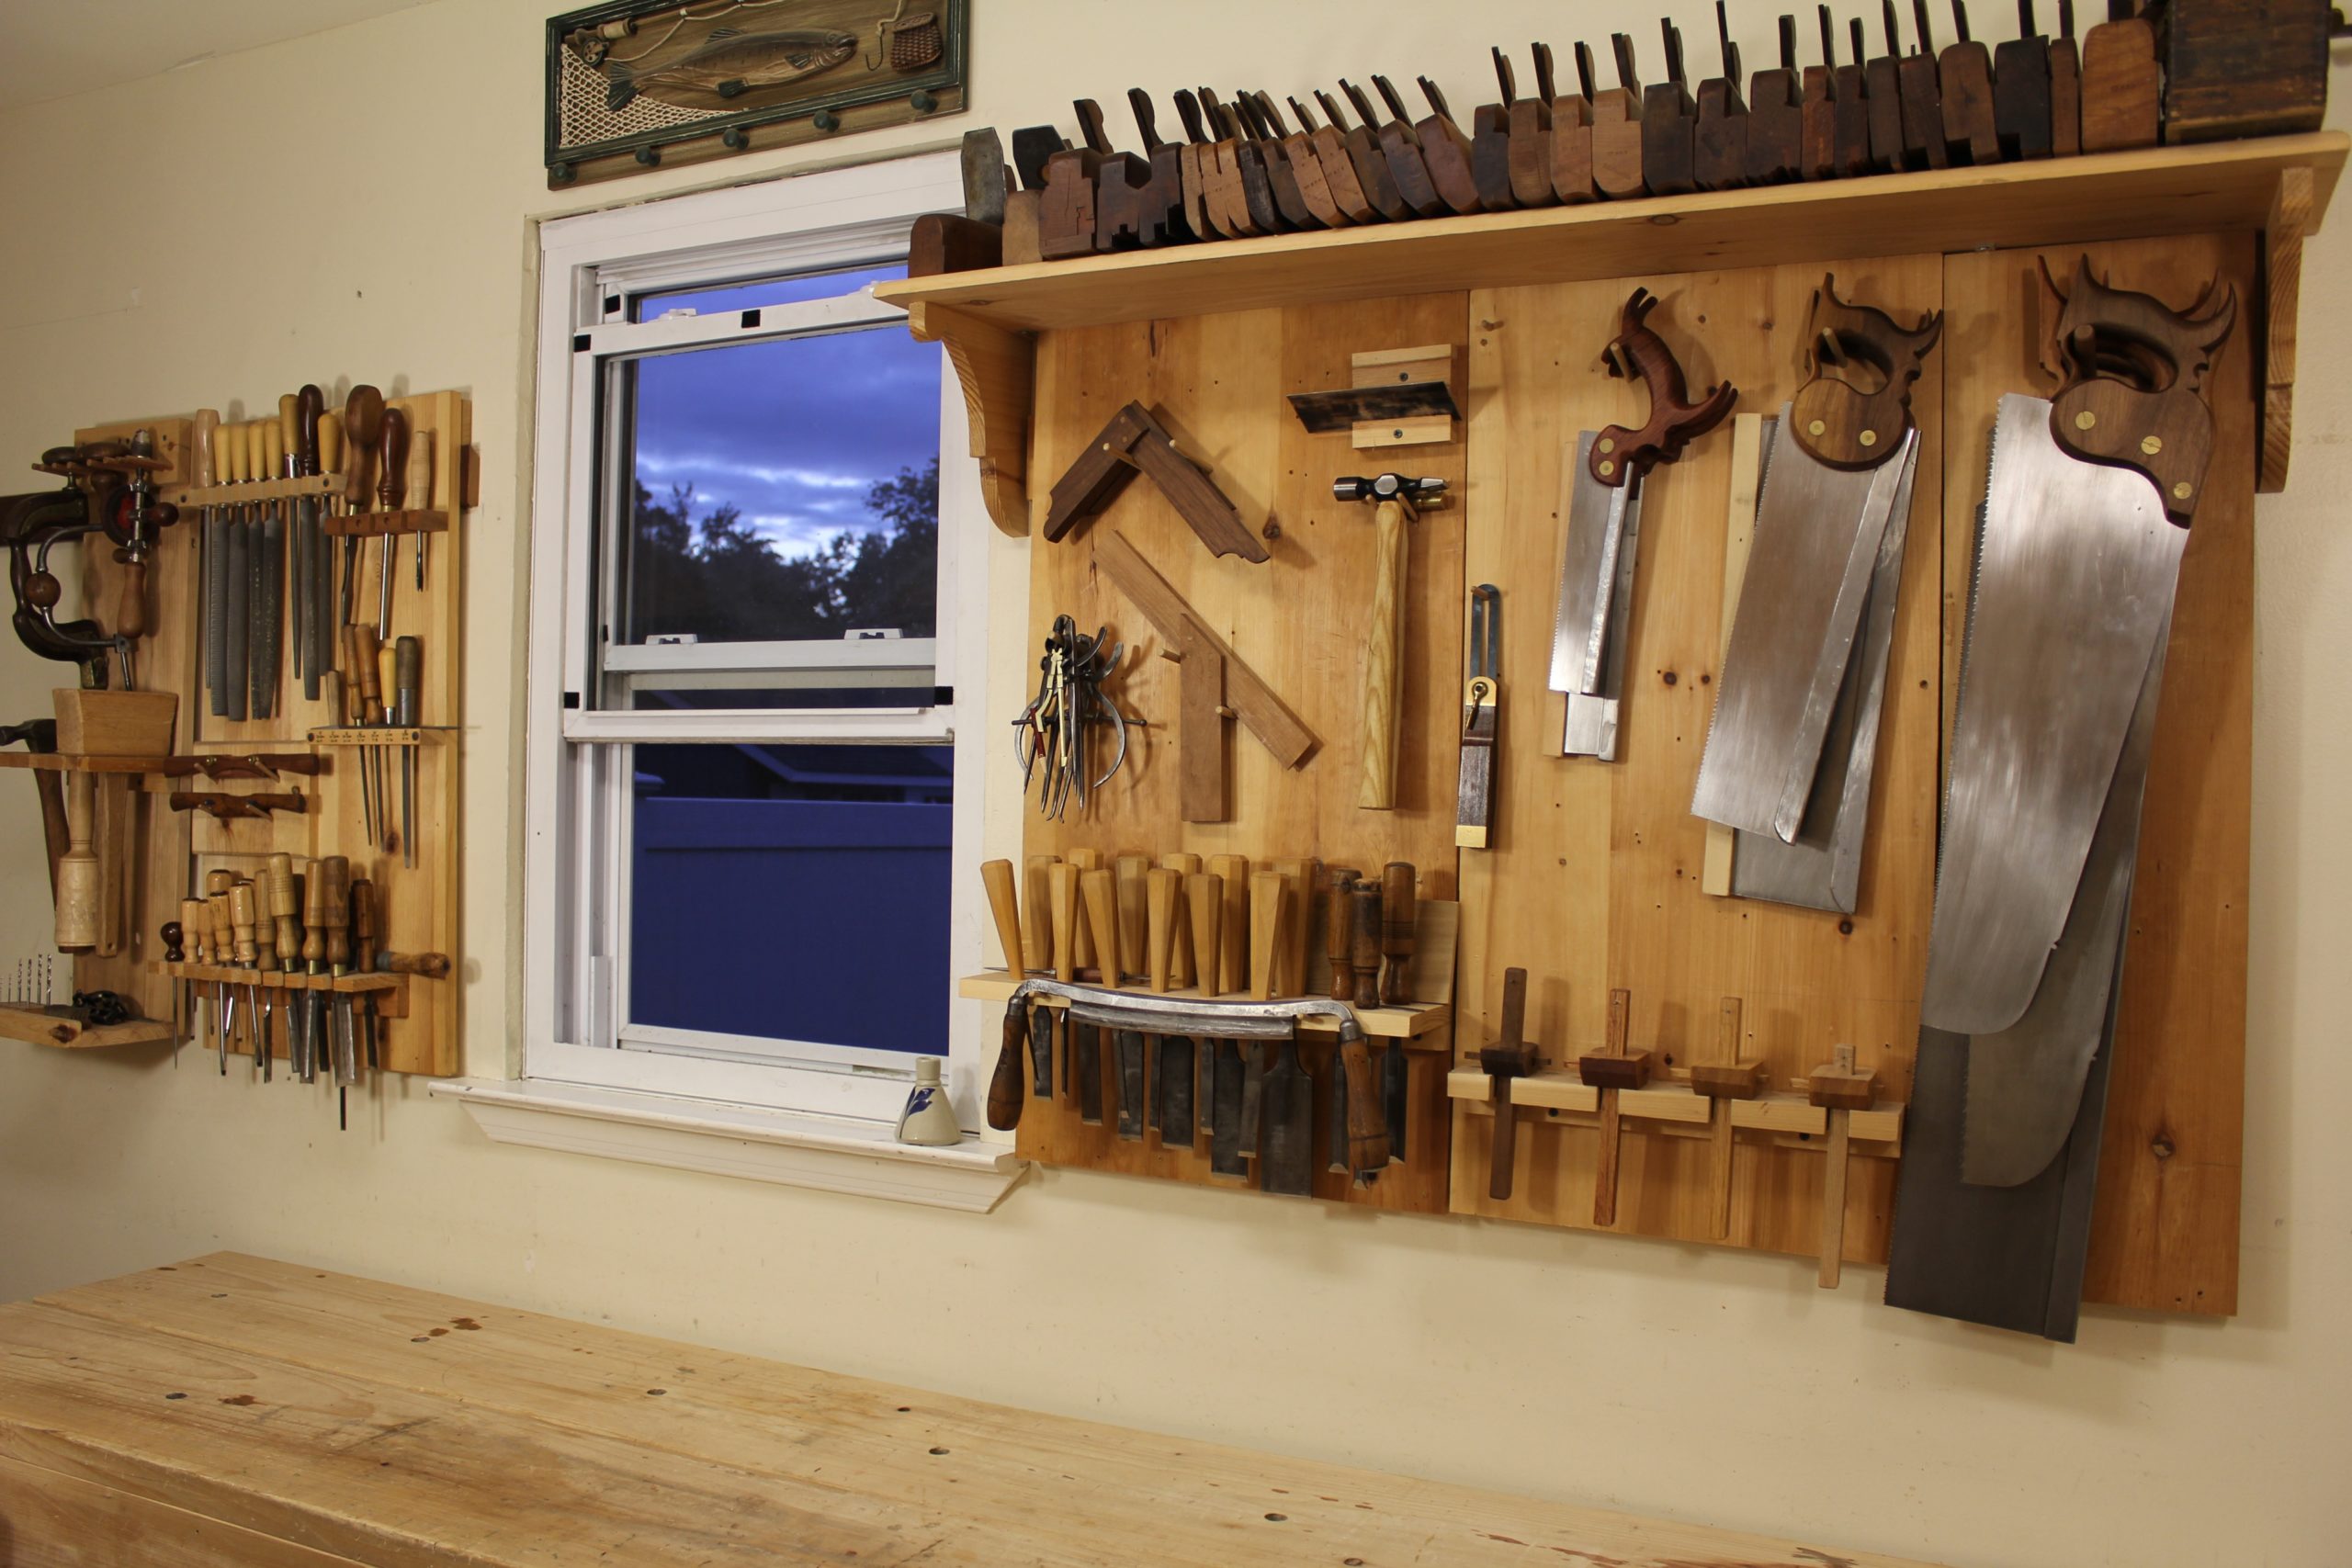
- Wall-mounted tool racks: Install sturdy wall racks designed to hold various hand tools. These racks help maximize space utilization and keep your tools easily accessible.
- Pegboards: Pegboards are versatile storage options that allow you to hang your tools using hooks or pegs. Arrange them according to categories and keep your workspace tidy.
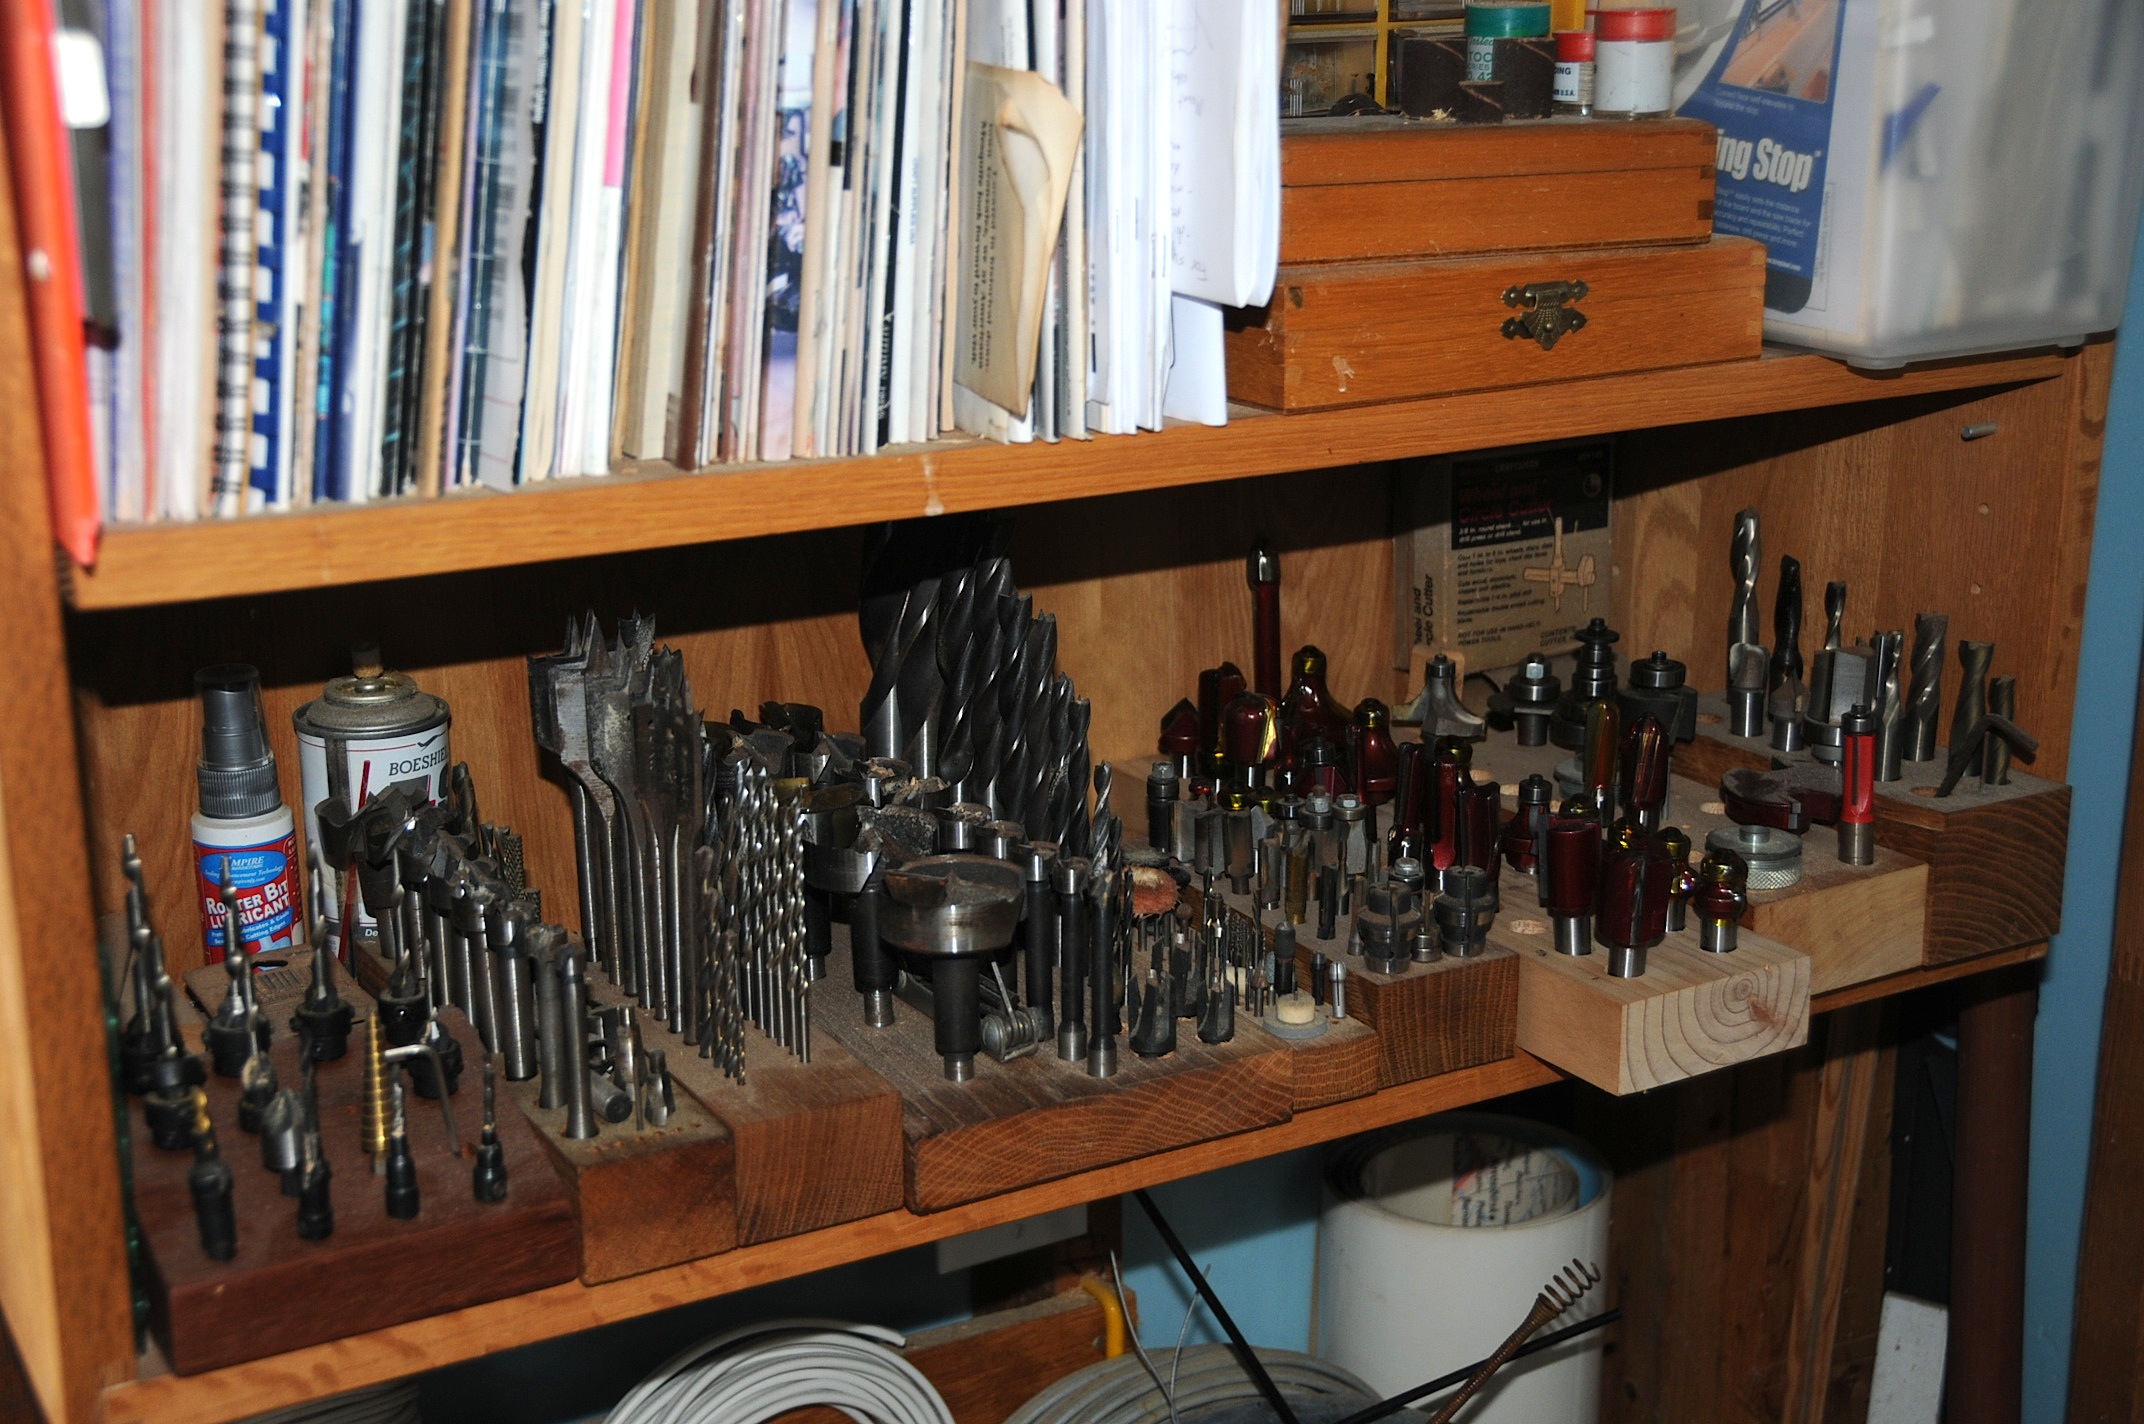
- Open shelves: Utilize open shelves to store larger antique hand tools or those you frequently use. Consider placing tools in labeled boxes or using dividers to prevent them from shifting around.
- Drawer organizers: For smaller hand tools such as screws, bolts, or drill bits, drawer organizers with multiple compartments can provide an orderly storage solution. Sort these items by size or type for ease of access.
Remember, the key to effective storage is creating a system that works best for you. Experiment with different solutions, and adapt them as needed to optimize your organization and preserve your cherished antique hand tools.
Credit: www.popularwoodworking.com
Displaying Antique Hand Tools
Discover innovative storage solutions for displaying antique hand tools. Find unique organizing options that showcase your collection in style while keeping them easily accessible.
Creating A Workshop Aesthetic
Antique hand tools not only serve a functional purpose but also carry historical significance and aesthetic value. When displaying these tools, creating a workshop aesthetic can enhance their charm and showcase their craftsmanship. Here are some ways to achieve an appealing workshop atmosphere for your antique hand tools:
- Workbench display: Place the tools on a vintage workbench to recreate the ambiance of a bygone era. This setup adds authenticity and invites admiration from visitors.
- Tool chests: Vintage tool chests not only provide practical storage but also offer an artistic display for your antique hand tools. Consider using a chest with glass panels to showcase the tools whilst protecting them.
- Rustic shelves: Install rustic wooden shelves on your workshop wall to exhibit your collection of antique tools. This creates a visually pleasing arrangement and adds character to the overall display.
Wall-Mounted Tool Displays
Leveraging wall space is an effective way to exhibit your antique hand tools while optimizing their accessibility. Consider the following wall-mounted tool display options:
- Shadow boards: These custom boards feature the outline of each tool, allowing them to be easily identified and returned to their designated spot. Shadow boards create an organized and visually appealing display, while ensuring that tools are readily available for use.
- Pegboards: Simple and versatile, pegboards offer a practical solution for displaying tools on your workshop wall. By arranging hooks, brackets, and shelves on the pegboard, you can create a customized display that showcases your antique hand tools in an orderly manner.
- Magnetic strips: Ideal for smaller tools, magnetic strips mounted on the wall provide a convenient and space-saving display option. The tools can be easily attached and removed, making them visible and readily accessible.
Using Glass Cabinets For Showcasing
Glass cabinets add an elegant and polished touch to the display of antique hand tools, offering protection while allowing viewers to admire the craftsmanship. Consider the following points when using glass cabinets:
- Adjustable shelving: Opt for glass cabinets with adjustable shelves to accommodate tools of various sizes. This allows you to create customized arrangements and ensure each tool is properly showcased.
- Lighting: Install lighting within the glass cabinet to accentuate the beauty of the tools on display. Proper lighting highlights the intricate details and craftsmanship of each piece, enhancing their visual appeal.
- Dust protection: Glass cabinets effectively protect your antique hand tools from dust, ensuring their longevity. This minimizes the need for frequent cleaning, allowing you to enjoy your collection without worrying about their maintenance.
Protecting Antique Hand Tools
Discover practical storage solutions for antique hand tools to ensure their protection and longevity. From custom-made wooden boxes to wall-mounted racks, these storage options offer both functionality and aesthetic appeal, providing a secure and organized space for your cherished tools.
Antique hand tools are not just items of historical significance but also treasured possessions for enthusiasts and collectors. However, preserving these tools requires careful consideration and proper storage. In this section, we will explore effective storage solutions for antique hand tools, focusing on protecting them from rust and corrosion as well as implementing moisture control methods.
Let’s dive in and learn more about these essential preservation techniques.
Preventing Rust And Corrosion:
- Regularly apply a thin coat of protective oil: This creates a barrier against moisture and prevents the formation of rust.
- Store tools in a dry environment: Avoid damp areas such as basements or areas prone to water leaks. Humidity can accelerate the corrosion process.
- Use desiccants or moisture-absorbing materials: Silica gel packs or moisture-absorbing pads help absorb excess moisture and maintain a dry environment.
- Inspect tools for rust regularly: If you notice any signs of rust, treat it promptly to prevent further damage. Use a rust-removing solution or fine-grit sandpaper to remove the rust and protect the tool’s integrity.
Moisture Control Methods:
- Utilize a dehumidifier: This device helps reduce humidity levels in your storage area, preventing moisture buildup.
- Implement proper ventilation: Ensure that the storage area has adequate airflow to prevent moisture condensation.
- Avoid direct contact with concrete: Placing tools directly on concrete surfaces can lead to moisture transfer. Use pallets or racks to elevate them.
Importance Of Proper Tool Storage:
- Prolongs tool life: By protecting antique hand tools from moisture and rust, you ensure their longevity and usability for generations to come.
- Preserves historical value: Proper storage safeguards the authenticity and historical integrity of these tools, enhancing their value.
- Easy accessibility and organization: Implementing a systematic storage method allows for easy access and retrieval of tools when needed.
- Prevents accidental damage: Properly stored tools are less likely to suffer accidental damage, ensuring their functionality remains intact.
Remember, by taking the necessary precautions to protect your antique hand tools from rust, corrosion, and moisture, you can preserve their quality and historical value. Implementing these storage solutions not only safeguards your investment but also allows you to appreciate and utilize these remarkable tools for years to come.
Cleaning And Lubricating Antique Hand Tools
Discover efficient storage solutions for antique hand tools, ensuring they stay clean and properly lubricated. Preserve their historical value by utilizing a range of storage options designed specifically for these cherished tools.
Removing Dirt And Grime
- First, examine the antique hand tools carefully and assess the level of dirt and grime buildup.
- Gently brush away loose dirt and debris using a soft-bristled brush.
- Use a mild detergent or specialty cleaning product to create a cleaning solution.
- Dip a clean cloth or sponge into the cleaning solution and wring out any excess liquid.
- Wipe down the tools, paying special attention to the nooks and crannies where dirt may accumulate.
- For stubborn grime, use a toothbrush or soft-bristled brush to scrub gently.
- Rinse the tools thoroughly with clean water and pat them dry using a clean towel.
- Allow the tools to air dry completely before proceeding with the next steps.
Selecting Appropriate Lubricants
- Choose a lubricant that suits the specific requirements of the hand tools and their materials.
- Consider using a light machine oil, such as sewing machine oil or 3-in-1 oil, for metal surfaces.
- Apply a small amount of oil to a clean cloth or rag and rub it onto the metal parts of the tools.
- Ensure the lubricant reaches all moving parts, such as pivot points and hinges.
- For wooden handles and grips, use a wood conditioner or wax to keep them moisturized and prevent cracking.
- Apply the wood conditioner or wax to a clean cloth and rub it gently onto the wooden surfaces.
- Allow the lubricant to penetrate the wood, and then wipe away any excess residue.
- Regularly inspect the tools for signs of wear or dryness and reapply lubricants as needed.
Regular Maintenance Routines
- Create a schedule for regular maintenance to ensure the longevity of the antique hand tools.
- Inspect the tools periodically for any signs of rust, corrosion, or damage.
- Remove any rust or corrosion using fine steel wool or sandpaper, being careful not to damage the tool’s surface.
- After removing rust or corrosion, clean and lubricate the affected areas to prevent further damage.
- Store the tools in a dry and climate-controlled environment to prevent moisture damage.
- Consider using tool rolls, cases, or racks to keep the tools organized and protected.
- Perform routine checks for loose handles or mechanisms and tighten them as necessary.
- Avoid using excessive force or overloading the tools to prevent unnecessary strain.
By following these cleaning and lubrication techniques, as well as maintaining a regular maintenance routine, you can ensure that your antique hand tools remain in excellent condition for years to come. So, roll up your sleeves, grab your cleaning supplies, and provide your beloved tools with the attention they deserve!
Sharpening Antique Hand Tools
Discover a range of storage solutions for antique hand tools to ensure their longevity and accessibility, keeping them in pristine condition for future use. Easily organize and protect your collection with specially designed tool chests, wall-mounted racks, and custom-built cabinets.
Understanding Different Sharpening Techniques
- Sharp tools are essential for effective and enjoyable woodworking experiences. When it comes to antique hand tools, understanding different sharpening techniques is crucial. Here are some key points to keep in mind:
- Freehand sharpening: This technique involves sharpening the tool’s edge using a sharpening stone without any additional guides. While it requires skill and practice, it allows for more control and flexibility in achieving the desired sharpness.
- Honing guides: Using honing guides can be beneficial, particularly for beginners or those who prefer consistent results. These guides hold the tool at the correct angle, making it easier to maintain a consistent bevel angle during sharpening.
- Oil stones: When selecting a sharpening stone, oil stones are a popular choice for antique hand tools. They consist of natural or synthetic materials and require oil as a lubricant. Oil stones offer fine-grained surfaces, ideal for achieving razor-sharp edges on delicate antique tools.
- Water stones: Another sharpening option is water stones, which differ from oil stones in terms of their composition and usage. Water stones are soaked in water before sharpening, and their softer abrasive material quickly removes metal to create a sharp edge. They are suitable for most hand tools but may require more frequent flattening.
- Diamond stones: For efficient sharpening, diamond stones are a top choice. These stones are coated with diamond particles, facilitating faster material removal and extending their lifespan. Diamond stones are effective for restoring a neglected or heavily damaged antique tool.
Using Honing Guides And Oil Stones
- Maintaining the cutting edges of antique hand tools can be achieved effectively through the use of honing guides and oil stones. Here are some key aspects to consider:
- Consistent bevel angles: Honing guides ensure a consistent bevel angle during sharpening, regardless of the user’s skill level. This can be especially helpful when working with delicate and intricately shaped antique tools, where precision is essential.
- Stability and control: Honing guides provide stability and control by securely holding the tool in place throughout the sharpening process. This reduces the risk of uneven sharpening or unintentional rounding of the cutting edge.
- Efficient sharpening: By utilizing honing guides, sharpening with oil stones becomes more efficient. The guides allow for precise movement across the stone’s surface, maximizing the contact between the tool’s edge and the abrasive material.
- Lubrication and cleanliness: Oil stones require lubrication with honing oil or mineral oil to enhance the sharpening process. The oil helps reduce friction and removes metal particles, keeping the stone clean and preventing clogging.
- Grit selection: Oil stones come in different grit sizes, allowing users to choose the appropriate level of abrasiveness. Coarse grits are suitable for initial sharpening or repairing chipped edges, while fine grits polish and refine the cutting edge for a razor-sharp finish.
Maintaining Cutting Edges
- Ensuring the longevity and performance of antique hand tools involves proper maintenance of their cutting edges. Consider the following points:
- Regular inspection: Periodically inspect your antique hand tools for signs of dullness, chips, or wear. Detecting these issues early allows for timely sharpening and prevents them from becoming more severe.
- Sharpening frequency: The frequency of sharpening depends on the tool’s usage and the materials it cuts. Well-maintained tools may require only light touch-ups, while heavily used tools may need more frequent sharpening.
- Sharpening techniques: Depending on personal preference and the tool’s condition, choose the appropriate sharpening technique. Freehand sharpening offers more control, while honing guides ensure consistency. Experiment with different techniques to find what works best for you.
- Flattening the back: Some antique tools, such as plane blades or chisels, require flattening the back surface before sharpening. This process helps ensure a flat and even contact between the tool and the sharpening stone, resulting in a sharper edge.
- Storage and protection: After sharpening, store your antique tools in a dry and clean environment to prevent moisture buildup and rust. Consider using protective cases or individual storage solutions to avoid accidental damage.
Remember, maintaining sharp and well-tuned antique hand tools allows you to fully appreciate their craftsmanship and achieve exceptional woodworking results.
Storing Antique Hand Tools Long-Term
There are several storage solutions available for storing antique hand tools long-term. These include using wooden tool chests, wrapping each tool individually in acid-free tissue paper, and storing them in a clean and dry environment to prevent rust and deterioration.
Antique hand tools are valuable assets that require special attention when it comes to storage. Whether you’re a collector or a tradesperson seeking to preserve your vintage tools, proper storage is crucial for long-term preservation. Here are some storage solutions to ensure that your antique hand tools remain in excellent condition over time.
Wrapping And Padding For Protection
To protect your antique hand tools from scratches, rust, and other forms of damage, consider the following wrapping and padding options:
- Rust inhibitor paper: Wrap your tools in acid-free rust inhibitor paper to prevent moisture and rust formation.
- Microfiber cloths: Place microfiber cloths between tools to prevent them from scratching each other.
- Bubble wrap: Wrap individual tools in bubble wrap to provide cushioning and prevent impacts.
- Packing peanuts: Fill empty spaces in storage containers with packing peanuts to add an extra layer of protection.
Temperature And Humidity Considerations
Temperature and humidity levels can greatly affect the condition of your antique hand tools. To ensure optimal preservation, keep the following in mind:
- Stable temperature: Store your tools in an area with a stable temperature, ideally between 45°F and 70°F (7°C and 21°C).
- Low humidity: Maintain a relative humidity level of around 40-50% to prevent rust and minimize the risk of wood swelling or warping.
- Avoid moisture-prone areas: Keep your tools away from basements, attics, and areas prone to excessive moisture or temperature fluctuations.
Long-Term Storage Solutions
When it comes to long-term storage of antique hand tools, consider the following solutions:
- Tool chests: Invest in a high-quality tool chest with drawers or compartments specifically designed to store and organize hand tools.
- Tool cabinets: Opt for a wall-mounted tool cabinet with customized storage options for your antique hand tools.
- Wall racks: Install sturdy wall racks to hang your tools, providing easy access while keeping them off the ground.
- Shadow boards: Create custom shadow boards by tracing the outline of each tool on a board, making it easy to identify and store tools properly.
Remember to periodically inspect and maintain your antique hand tools, checking for any signs of deterioration or damage. With the right storage solutions and proper care, your beloved antique hand tools will remain in fantastic condition for generations to come.
Evaluating The Condition Of Antique Hand Tools
Discover the perfect storage solutions for your antique hand tools. From custom-made cabinets to wall-mounted racks, there are various options available to keep your tools organized and well-preserved. Efficient storage is essential for maintaining the condition of these valuable collectibles.
Assessing The Existing Condition:
- Look for visible signs of damage: Inspect the antique hand tools closely to identify any visible signs of wear, rust, cracks, or missing parts.
- Check for functionality: Test the functionality of the tools to ensure they are still in working condition. Move any movable parts and assess their smoothness and flexibility.
- Examine the overall structure: Pay attention to the tool’s handle, blade, or any other components and assess their condition. Look for stability, loose parts, or any signs of weakness.
- Consider the age and historical significance: Determine the age of the tool and understand its historical importance, as it can influence the evaluation of its current condition.
- Document the findings: Take notes or photographs of the tool’s condition and any specific areas that require attention or restoration.
Identifying Potential Restoration Needs:
- Remove dirt and grime: If the tools are covered in dirt or grime, use a soft brush or cloth to gently clean them. Avoid using harsh chemicals that might damage the tool’s surfaces.
- Address rust and corrosion: If the antique hand tools suffer from rust or corrosion, carefully remove it using fine-grit sandpaper or steel wool. Consider using rust converter products to prevent further deterioration.
- Repair or replace worn parts: Identify any broken or worn-out parts that need repair or replacement. It could include handles, blades, hinges, or any other components that are no longer functional.
- Evaluate the necessity of reconditioning: Determine if the tool requires reconditioning, such as sharpening blades, honing edges, or polishing surfaces. This can significantly improve their usability and appearance.
- Seek professional guidance: If uncertain about the restoration process, consult with experts or professionals specializing in antique tool restoration. They can provide advice on the best restoration practices and techniques specific to each tool.
Prioritizing Restoration Projects:
- Consider the tool’s importance and usability: Assess the significance and usefulness of each antique hand tool to prioritize restoration. Tools with higher historical value or daily utility may take precedence.
- Evaluate restoration complexity: Estimate the time, effort, and resources required for each restoration project. Start with simpler tasks before tackling more intricate repairs or restorations.
- Decide based on available resources: Take into account the resources at your disposal, such as tools, materials, and time. Prioritize restoration projects that align with your available means.
- Balance immediate needs with long-term goals: Determine if any tools require immediate attention due to severe damage or safety concerns. Simultaneously, consider the long-term preservation goals for all the antique tools in your collection.
- Preserve originality whenever possible: Strive to maintain the originality of the tool during the restoration process. When choosing restoration techniques, aim to preserve or enhance the tool’s historical and aesthetic value.
Remember that assessing the existing condition, identifying potential restoration needs, and prioritizing restoration projects are essential steps in maintaining and preserving antique hand tools. Following these guidelines will help you make informed decisions and prolong the lifespan of these invaluable artifacts.
Restoring Wooden Handles
Discover a range of storage options for antique hand tools, including innovative solutions for restoring wooden handles. Enhance the longevity of your prized tools with effective storage techniques.
Wooden handles on antique hand tools can deteriorate over time due to wear and tear, exposure to moisture, or the effects of aging. Restoring the wooden handles not only improves their appearance but also enhances their functionality and extends their lifespan.
Here are some effective solutions for repairing and refinishing wooden handles:
Repairing Cracks And Splits:
- Inspect the handle carefully to identify any cracks or splits.
- Use a fine-toothed saw to cut a small groove around the damaged area. This prevents further splitting.
- Apply wood glue to the cracked or split area and press it together firmly. Wipe off any excess glue with a damp cloth.
- Place clamps or apply pressure on the handle to keep the glued parts in place as the adhesive dries.
- Once the glue has fully dried, sand the repaired area gently with sandpaper to smoothen the surface.
- Apply a coat of wood finish or sealant to protect the handle and restore its natural look.
Removing Old Finishes:
- Use a paint stripper or a heat gun to remove the existing finish from the wooden handle. Follow the instructions provided by the manufacturer.
- Carefully scrape off the softened finish using a putty knife or a scraper. Be cautious not to damage the wood.
- After removing the old finish, use fine-grit sandpaper to sand away any remaining residue or traces of the previous coating.
- Wipe the handle clean with a cloth or a tack cloth to remove any dust or debris.
Applying New Finishes And Sealants:
- Choose a suitable wood finish or sealant based on the type of wood and its intended use.
- Apply a thin and even coat of the chosen finish using a brush or a cloth. Make sure to follow the product instructions for the ideal application method.
- Allow the first coat to dry completely before applying subsequent coats. Sand lightly between coats to achieve a smooth finish.
- Depending on the desired level of protection and appearance, apply multiple coats of finish or sealant.
- Once the final coat has dried, gently buff the handle with a soft cloth to enhance its shine and smoothness.
By following these steps in restoring the wooden handles of antique hand tools, you can revive their beauty and functionality. Conserving these tools not only preserves their historical value but also ensures that they can continue to be used for generations to come.
Refurbishing Metal Components
Discover a range of storage solutions tailored for antique hand tools, from wall-mounted racks to sturdy cabinets, ensuring they are well-organized and protected while adding a touch of vintage charm to your workspace. Safely refurbish metal components with these practical yet stylish options.
Antique hand tools are not only valuable in terms of history and craftsmanship but also serve as practical tools for woodworking enthusiasts. However, over time, metal components of such tools can become rusty and corroded, affecting their functionality and aesthetic appeal.
To restore these tools to their former glory, it is essential to engage in a process of refurbishing the metal components. This article will guide you through the steps involved in removing rust and corrosion, polishing and reconditioning metal surfaces, and applying protective coatings to ensure the longevity of your antique hand tools.
Removing Rust And Corrosion:
- Use a wire brush or steel wool to gently scrub away surface rust.
- Apply a rust remover product, such as naval jelly or rust converter, following the manufacturer’s instructions.
- For stubborn rust stains, create a paste by mixing baking soda and water, and then gently scrub the affected areas.
- Rinse the metal components thoroughly and dry them completely.
- Treat any remaining corrosion by soaking the tools in a solution of equal parts white vinegar and water for several hours, then scrub and rinse them.
Polishing And Reconditioning Metal Surfaces:
- Begin by sanding the metal surfaces using fine-grit sandpaper to remove any remaining rust or old coatings.
- For heavily corroded areas, use a rotary tool with a sanding or wire brush attachment.
- Once the surfaces are smooth, use metal polish or a specialized metal cleaner to restore shine and remove stains.
- Apply the polish using a soft cloth, working in circular motions until the desired finish is achieved.
- To further recondition the metal, apply a metal conditioner or penetrating oil to prevent future rust and corrosion.
Applying Protective Coatings:
- After refurbishing the metal components, it is crucial to apply a protective coating to maintain their condition.
- Choose a suitable coating, such as clear lacquer or metal sealant, based on the tool’s intended use and desired appearance.
- Apply the coating evenly using a brush or spray, following the manufacturer’s instructions.
- Allow the coating to dry completely before handling or storing the tools.
- Regularly inspect the tools for signs of wear or damage, reapplying protective coatings as needed.
Refurbishing the metal components of antique hand tools is an essential step in preserving their functionality and aesthetic value. By removing rust and corrosion, polishing and reconditioning the metal surfaces, and applying protective coatings, you can ensure these tools remain in pristine condition for years to come.
So, roll up your sleeves and breathe new life into your cherished antique hand tools!
Frequently Asked Questions Of What Storage Solutions Are Available For Antique Hand Tools?
What Is The Proper Safekeeping And Storage Of Hand Tools?
Proper safekeeping and storage of hand tools requires: 1. Clean tools before storing to prevent rust and damage. 2. Store tools in a dry and secure place to avoid moisture and theft. 3. Use toolboxes or racks to organize and protect tools from getting lost or damaged.
4. Regularly inspect and maintain tools to ensure they remain in good working condition.
What Are The 5 Proper Ways Of Storing Tools And Equipment?
Properly storing tools and equipment involves: using a toolbox, organizing by type, keeping in a dry area, and securing with locks.
What Is The Ideal Storage Place For Tools?
The ideal storage place for tools is a well-organized toolbox or sturdy tool cabinet.
What Are The Different Types Of Tool Storage?
The different types of tool storage include toolboxes, tool chests, tool bags, and wall-mounted tool storage.
Conclusion
There is a wide range of storage solutions available for antique hand tools, ensuring their preservation and easy access. From wooden tool chests to wall-mounted racks, each option offers its own benefits. Antique tool collectors can opt for custom-built cabinets or opt for pre-made storage systems available online or at specialty stores.
Storing these valuable tools in a dry and climate-controlled environment helps prevent rust and corrosion. Additionally, organizing tools by type and size improves efficiency and makes it easier to locate specific items. Regular maintenance, such as oiling and cleaning, is essential to keep these tools in excellent condition.
By investing in proper storage solutions and following maintenance practices, antique hand tool collectors can enjoy their treasures for years to come. Remember to research and choose the best storage solution that suits your needs and budget.